This is the first post in the series documenting how I use Nix to manage my development environment, hope you can learn a thing or two.
Why Nix?
I first came across Nix from a YouTube video of Mental Outlaw and was fascinated to learn that I can use Nix to quickly migrate development environment to other machines, pretty awesome, right? But Nix got quite a steep learning curve, so today I will only show you how to get started using Nix and replace your existing package manager. And we will explore further in later posts.
One thing I don’t like about Homebrew is it mixes up the packages you install with their dependencies when calling many of the listed packages are just dependenciesbrew list. It’s not the case with nix though, Nix only lists out what you explicitly tell it to install
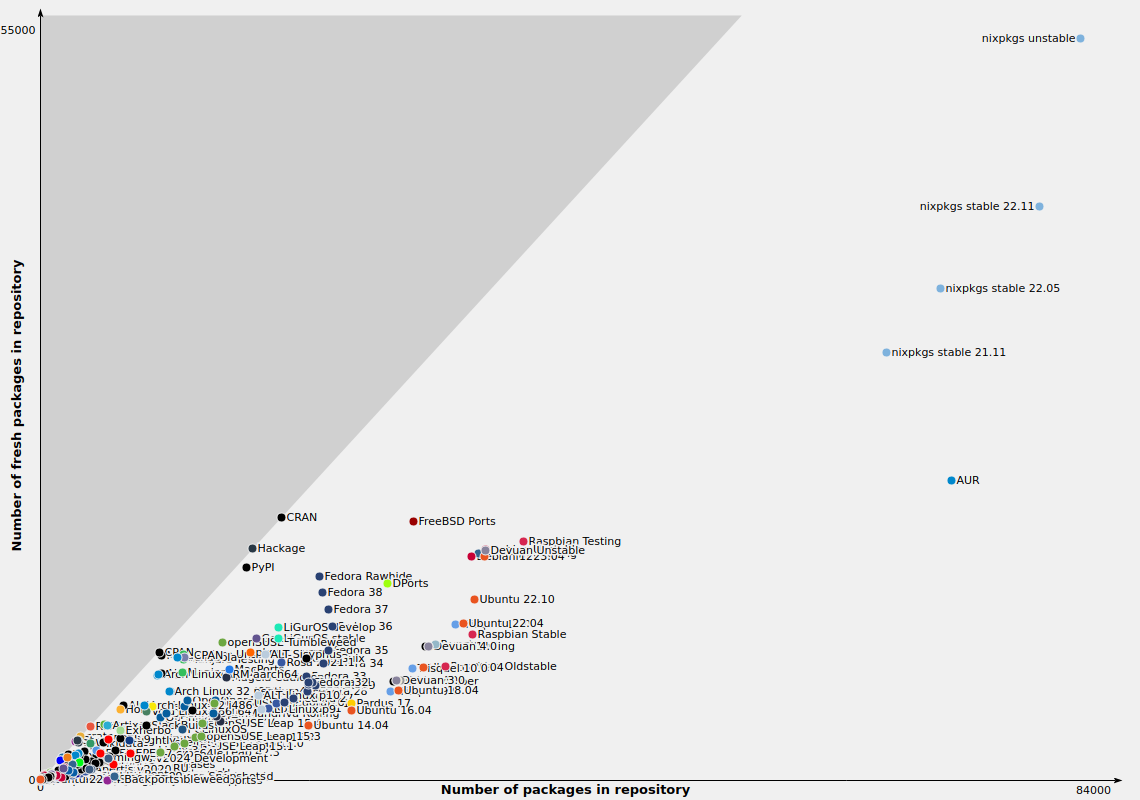
Additionally, Nix has a massive number of packages and works on both macOS, Linux and Windows WSL.

nixpkgs unstable and stable sit at the top. See more at: https://repology.org/repositories/graphs
Start using nix
Now if you are convinced to use Nix, let’s get started. Just head over to their website
and follow the installation instructions. Then we will start with the most basic commands: nix-shell and nix-env.
Nix-shell
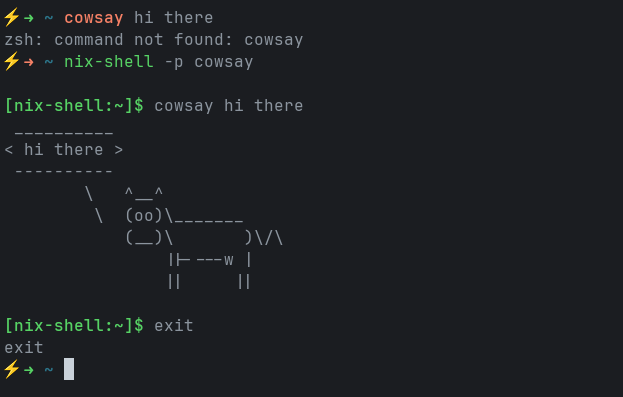
think of it as a shell that you can experiment with all the packages you want to try but not intending to install yet. A quick command to pull packages and then experiment with them is nix-shell -p <pkg-1> <pkg-2>. This will launch a bash shell which only contains packages you listed. When you are done with the experiment, press Ctrl+D or execute exit to get out of the shell.
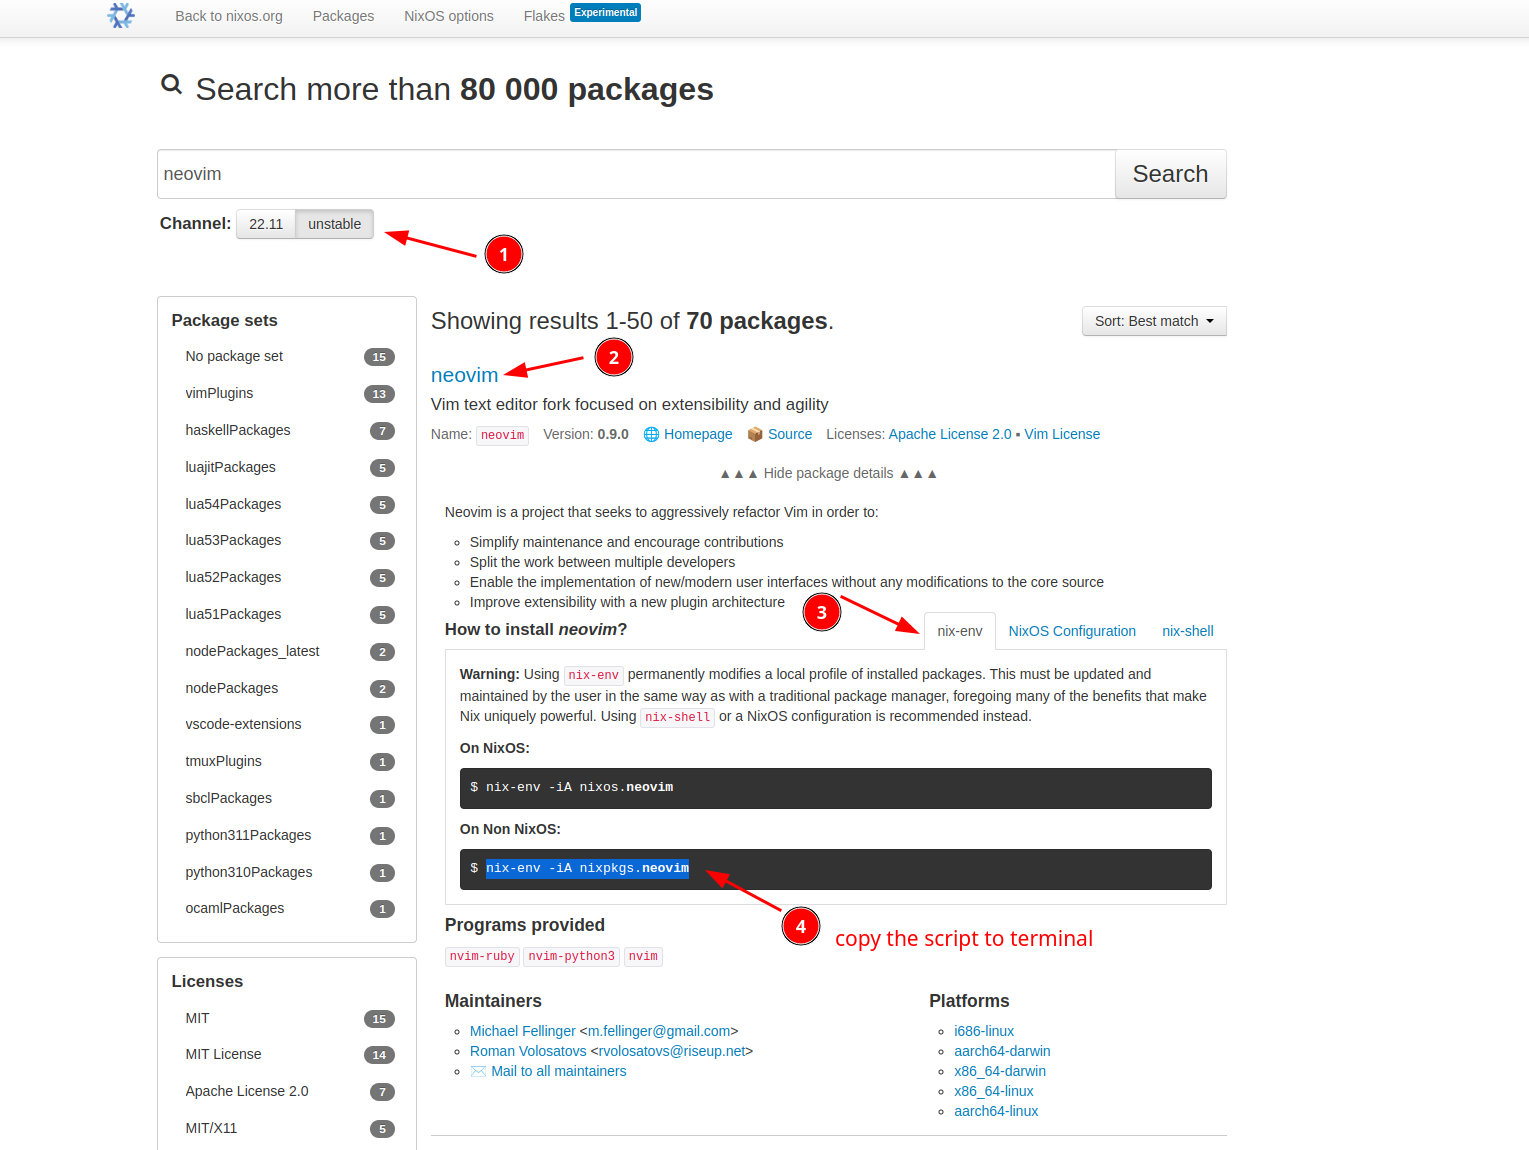
To search for a package, the easiest way is to head to https://search.nixos.org/ and choose the unstable channel for the latest package version.

as you can see, cowsay is only available while we are in nix-shell
Later, if you want to remove the unused package, run nix-collect-garbage
Nix-env
When it comes to permanently modifying the local profile of packages, you use nix-env, just like normal Homebrew. I’ll just cut to the chase and give you some examples of basic package management here, you can read more information in the official documentation
:
- search for package:
nix-env -qaP neovim - install package:
nix-env -iA nixpkgs.neovim - remove package:
nix-env -e neovim - upgrade a package:
nix-env -uA nixpkgs.neovim, upgrade all packages:nix-env -u
A quick way you can install is just to head to the search site that I mentioned before, search for the package you want, and copy the script to install to your terminal. Remember pick unstable channel and nix-env script, though.

Replace Homebrew with Nix
That’s it, now you know how to use nix to install your packages. But if you are using Homebrew and want to migrate away from it, then what I recommend is to list all the packages you use with brew list, then write down the packages you want to migrate, search and install them on Nix, and finally uninstall it from Homebrew with see more at stackoverflow
$ brew tap beeftornado/rmtree
$ brew rmtree <package>
One more thing I would like to mention is that not every package on Homebrew is also on Nix, especially those macOS-only GUI apps. So, you may want to keep using Homebrew too, I wrote this post to help you get familiar with Nix first before the next step, using Nix and Home Manager to manage your development environment across machines. If you want to see more, follow me on Twitter to get notified when I drop it.
If I got anything wrong, feel free to correct me down below! I’m still new to Nix and just want to write this to help anyone who comes after me get started. English is also not my first language, so don’t go too hard on me, please 😅 Thank you for reading!